
Arduino Uno to Android via Bluetooth
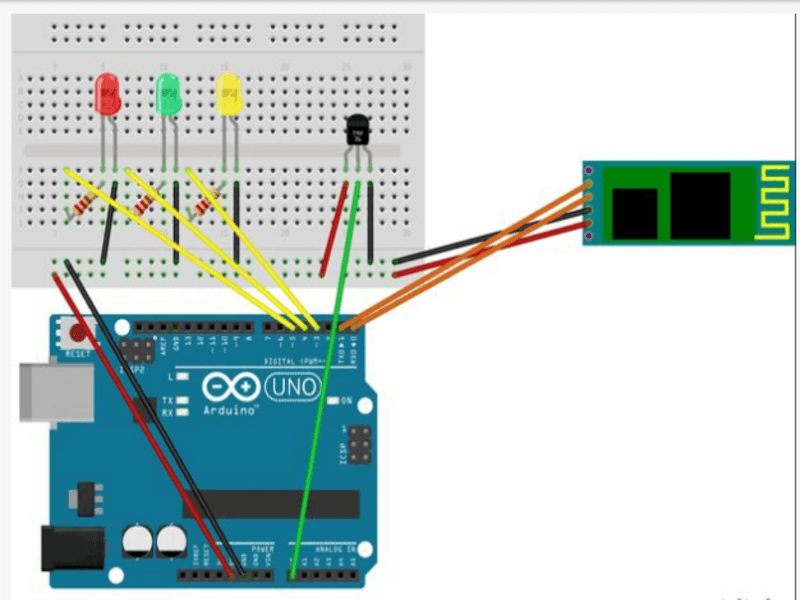
This circuit is helpful for being used in security places where you have to send signal whenver there is some unauthorized activity occur. Its hardware consisting of arduino and bluetooth shield can intelligently detect outgoing & incoming bluetooth signals.
Few LEDs of any desires colors being used. Some Jumper wires for connections and my Nexus 5 smart phone for sending signals. An android app is being having effective GUI which is useful for us. Coding is also being done on our arduino model on C language in Arduino IDE compiler.
We just need to “type # any number” in your smart phone to send signal at some place. The range of signal will be equal to the range of bluetooth shield. The future scope of our project will be using wifi shields in order to increase the range of our network so that it becomes more useful and effective in near future.
Laser Detector
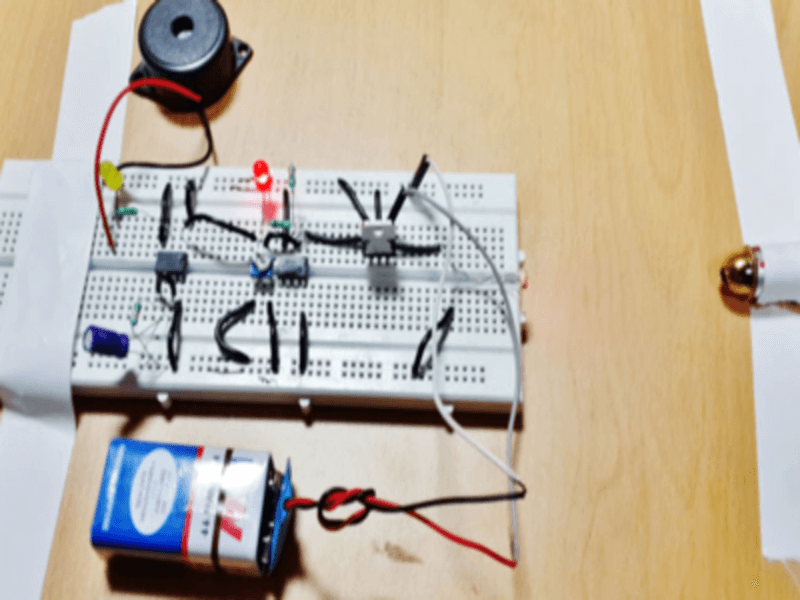
The objective of our project was to make a full proof security system to protect a particular and important location like hospitals, schools and offices etc from a explosive or from any kind of weapon.
In a piece of bread board we connect a battery of 9 v , 6 resistors in series , capacitors and LDR. We point laser light to LDR with a connection of red LED light with a Buzzer so that if a paper or any object comes between a laser light and a LDR Buzzer will create a sound or a noise and LED light will be turned ON. So, the circuit will work & it gives a security system which we can use anywhere we want.
This security system will give us a huge series of successful results because nowadays security is a big problem and this system will decrease crime, explosives and will decrease terrorism. It’s a very intellectual system for our law enforcing agencies to capture terrorists and save innocent people from explosives.
Capacitive Touch Arduino Lamp
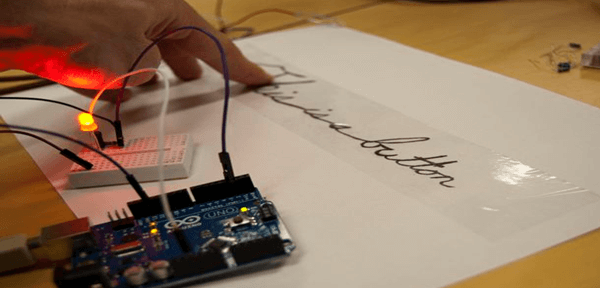
The scope of our project was to light-up lamp with the help of capacitive arduino touch sensor. The total cost on the project was about $20-$30. The most expensive part of the project was the Arduino, which came to about $6.00. Home Depot is such a rip-off.
At First we open the Arduino IDE software, and click on ArduinoISP.
Then connect your Arduino board to the computer, and click on "Upload”. Disconnect your Arduino board. Before plugging the USB cord into your Arduino, please double check that you haven't attached +5VDC to the GND pin and the GND to the +5VDC pin on your standalone chip. If you do this, you'll most likely let the smoke out of the chip.
The output of this project will
• Save yourself from any electric shock.
• Feasibility while Accessing light.
• Easy and Reliable
LIGHT CONTROLLER WITH BIDIRECTIONAL VISITOR COUNTER
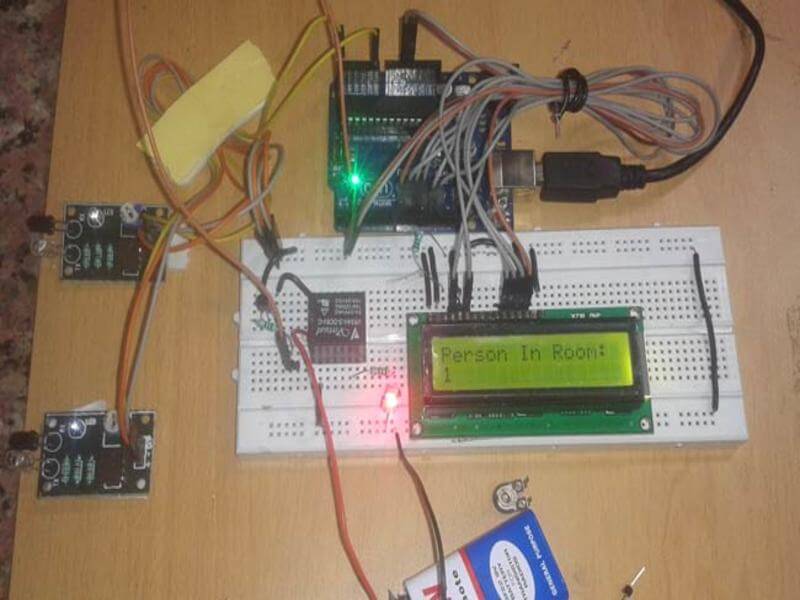
The objective of this project was:
• To make a controller based model to count number of persons visiting particular room, when someone enters the room counter adds to the number of persons in the room, as it is bidirectional counter so when someone exits the room it subtracts from the number of persons present.
Application of this project:
• For counting purposes. Where ever there is the need of counting and keeping record of people or visitors. For example stadiums, class rooms.
• For automatic room light control. To avoid wastage of light can be used in hotels, halls etc.